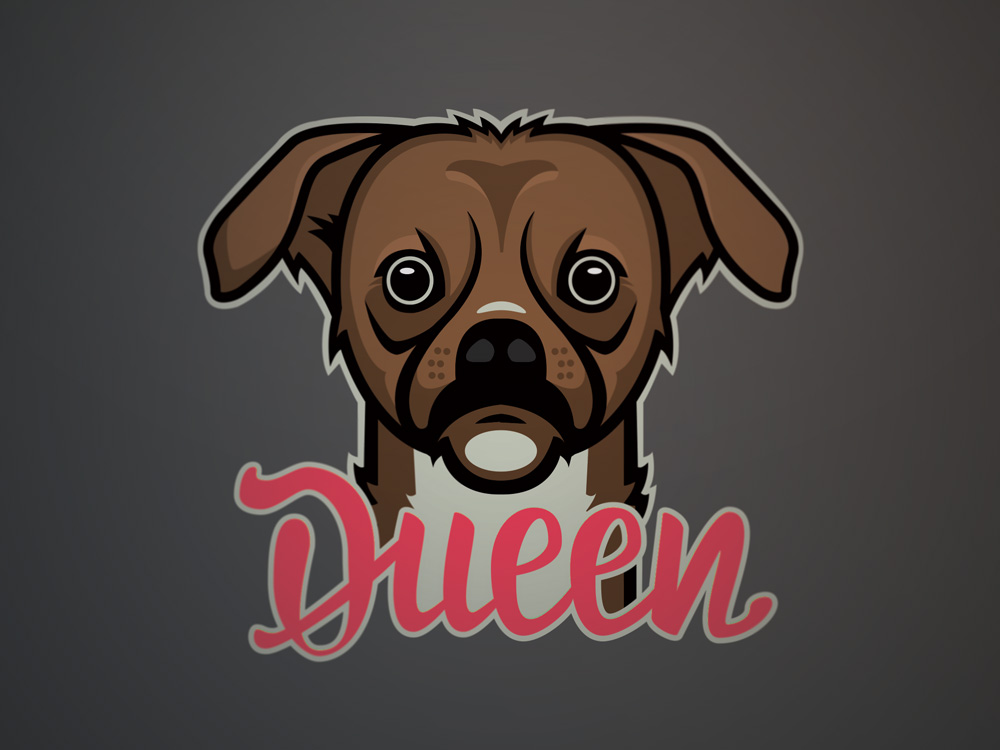
I did a dog portrait in logo style of a little dog named Johnny. Johnny really doesn’t show any expression on his face whatsoever.
My guess is that he’s just generally upset by having to wear a pink collar with the word “Queen” written on it…
I see Johnny on a regular basis when I go for a walk. And even though he doesn’t show his feelings, I know that he likes me.
Digital Dog Portrait Illustration, Made Step by Step
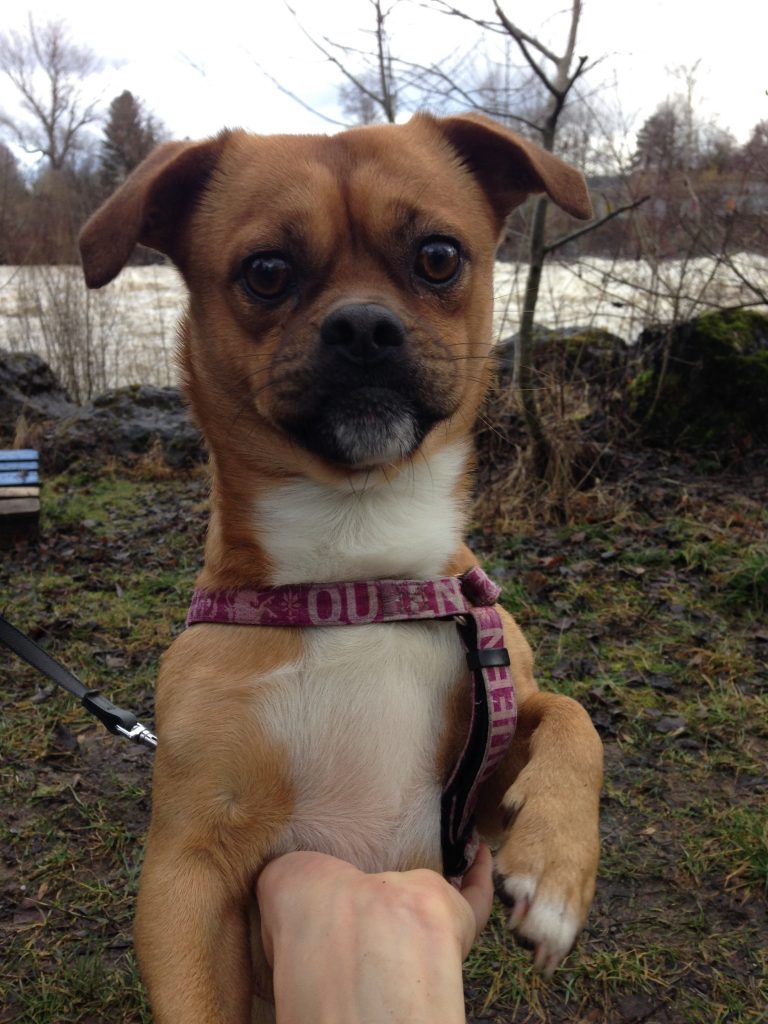
Step 1: Choosing the right image
I took a picture of Johnny that was quite symmetrical, which makes it easier for beginners. The trick is to illustrate only one half of the face and then to mirror it to get the final result. That also speeds up the process quite a bit.
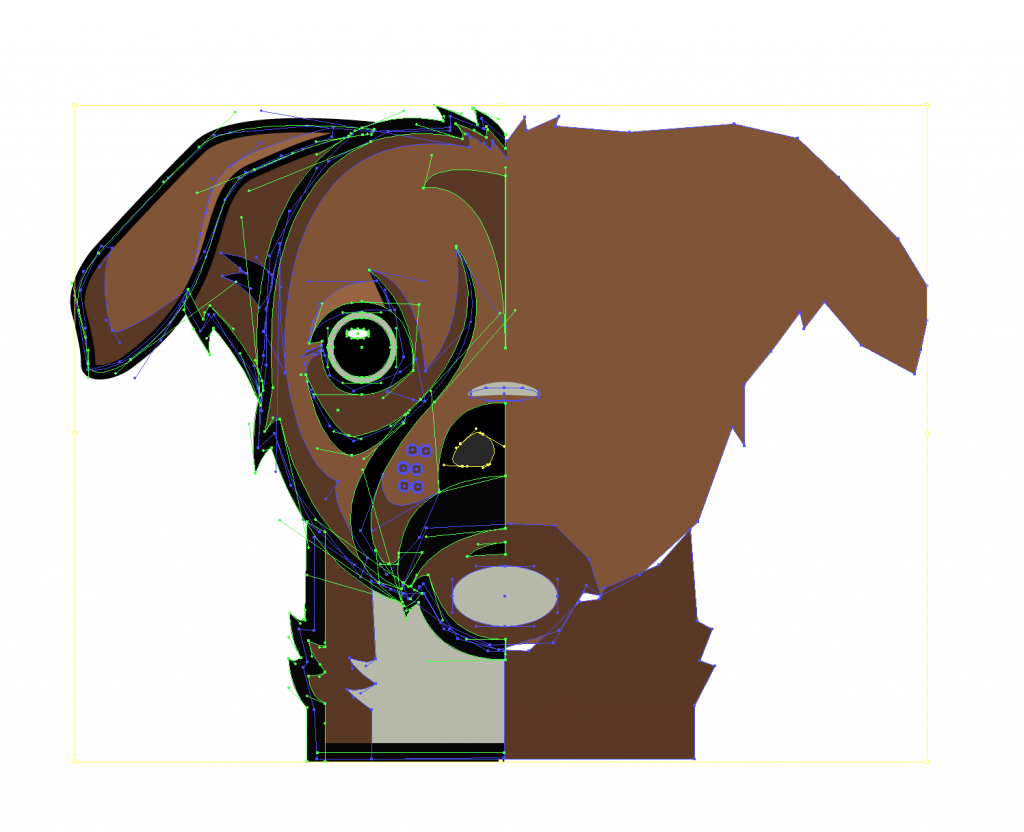
Step 2: Sketching with simple outlines
I used the Pen Tool in Illustrator to trace one side of the face with simple outlines. Once I was done with that, I mirrored the other side. Honestly, it looked funny at the beginning, so I went back one step and tweaked the illustration until I was happy with it.
Step 3: Creating negative space and bold lines
I added a new layer and re-drew the outlines with the Pen Tool. This time, I created shapes that I filled with black. In addition to the bold outlines, I added some negative space and fur details. Again, I first developed only one half, then copied and mirrored that until I was happy with the outcome.
The next step was to unite the two parts. One important step before mirroring is to make sure that the center points align. After doing this, I grouped the one half, copied, and mirrored it. Then I selected both sides and used the Align Tool to “Align To Object.” After that, I united the artwork with “Pathfinder” → “Unite Icon.”
Step 4: Coloration and shading
The final step for the dog portrait was to add some colors and to create some shadows. I created a new layer below the negative space. The procedure was the same as in step 3. First I created colored areas on one side, making sure the center points were aligned. Then I grouped them, copied, and mirrored the one half and united the artwork with the Pathfinder Tool.
Some Typography Love
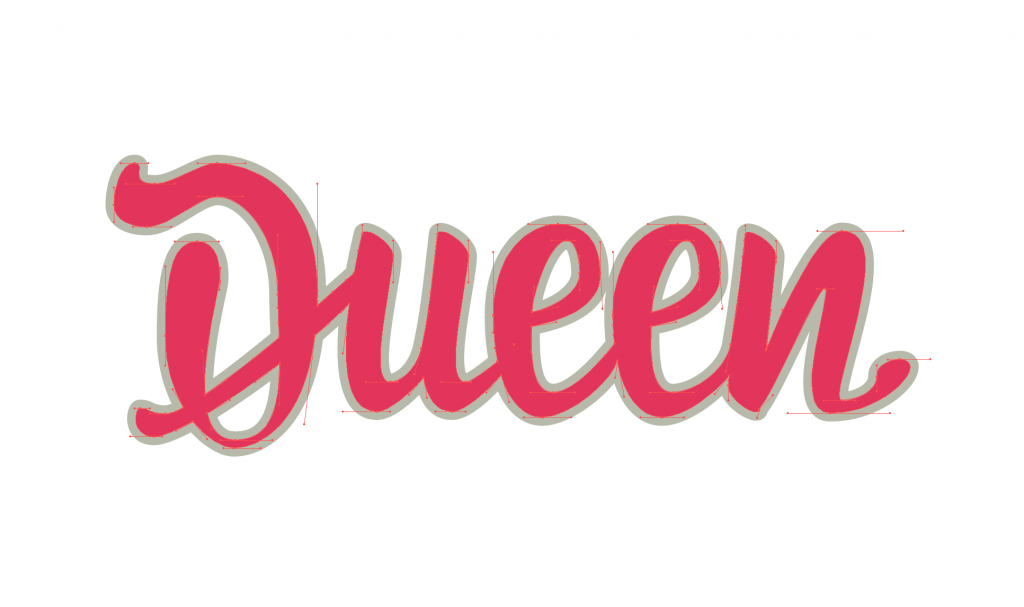
Since Johnny is wearing a collar with “Queen” written on it, I wanted to finish the artwork with a matching, pink, hand-lettered badge.
Drawing: I doodled the word “Queen” until I was happy with one draft.
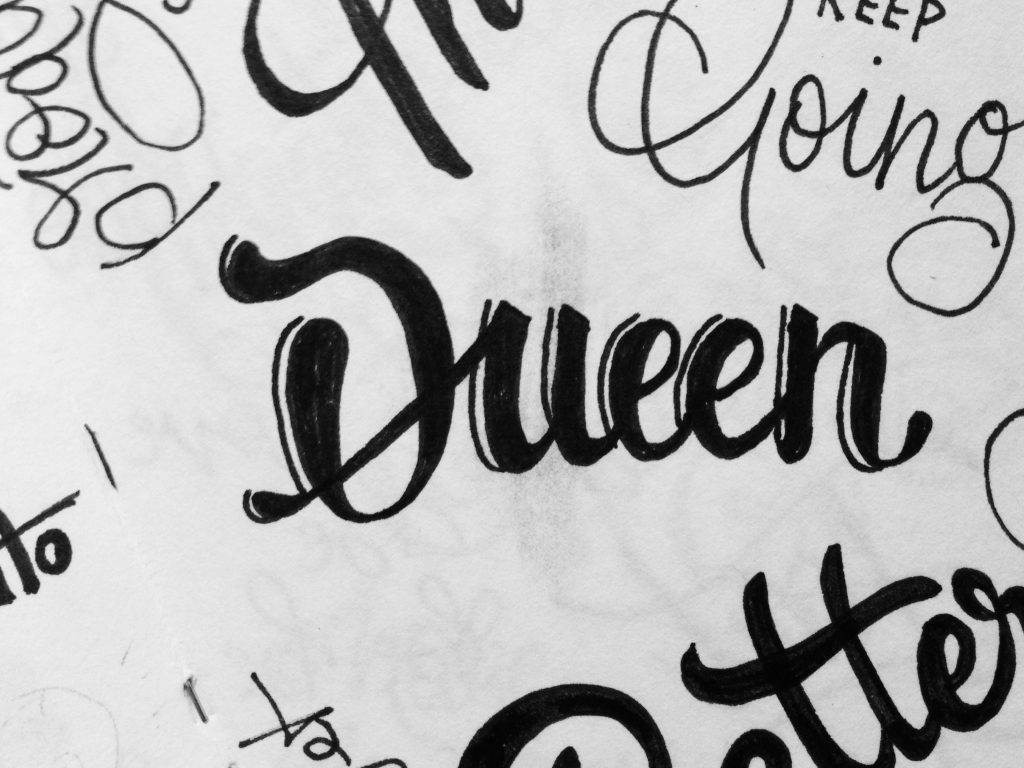
Digitize: I took a picture of it and started to trace it with the Pen Tool in Illustrator. When doing that, I try to keep my anchor point at a 90-degree angle to make the lettering easy to edit.
Finished Artwork
To finish up the dog portrait, I created a dark gradient in the background. Additionally, I put a blurry gradient filter on top of the entire illustration with Photoshop.
If you’d like to have a personalized portrait of your beloved pet, contact me!