When I see 3D lettering, I’m always in awe. It not only looks great, but also seems very complicated.
Computer programs such as 3D Studio Max and Cinema 4D are still alien to me. Even though these are sitting high on my “skills I want to learn” list, I’m sticking with my Adobe standard programs like Illustrator for now.
Illustrator has a lot to offer—even when it comes to 3D effects.
I’ll show you how to create smooth 3D lettering with the Blend Tool in no time—and in a way that won’t make your computer crash! 😉

Illustrator 3D Lettering Tutorial
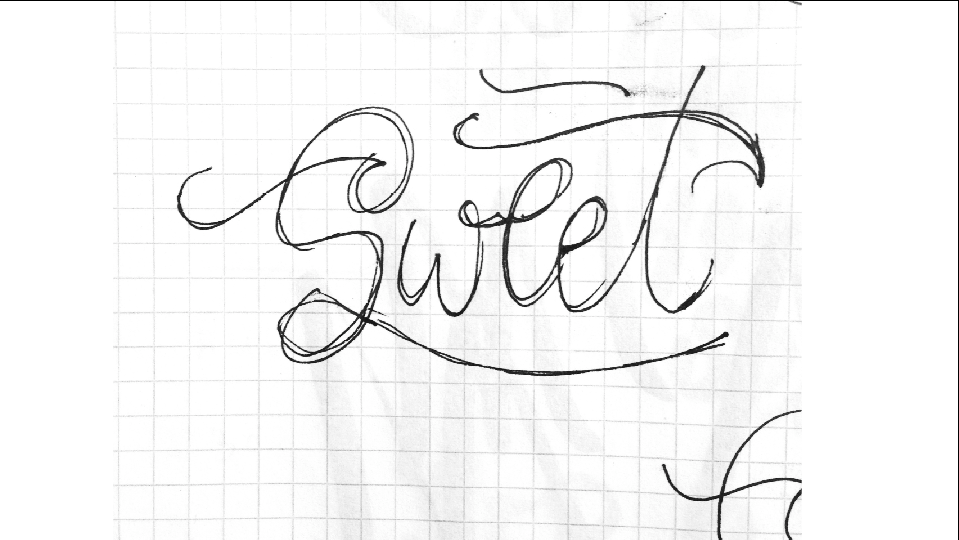
We’ll start with pen and paper to sketch out a word or single letter.
Then we’ll create a new document in Illustrator and insert the sketch, either by taking a photo or scanning it.
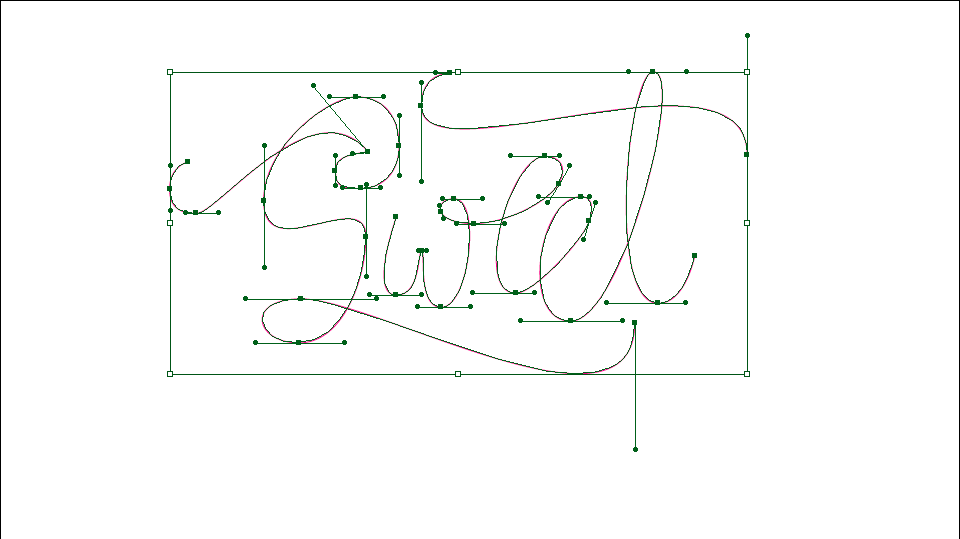
To make the sketch a vector path, we trace the text with the Pen Tool (P) and adjust as needed.
Tip: It’s helpful to split the word into shorter single pieces. Shorter parts get smoother and are fun to play around with by bringing them either to the front or back. Right click and choose Arrange > Send to Back (or Front).
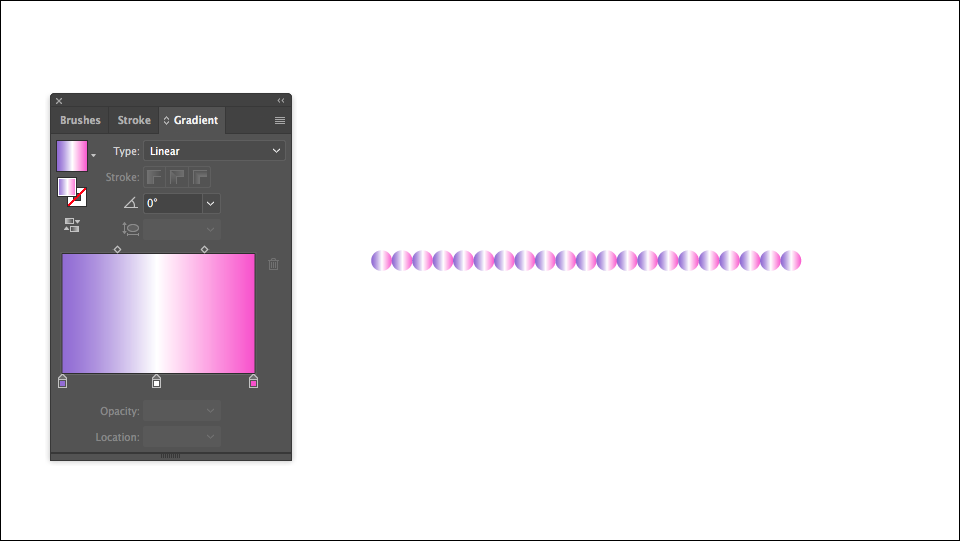
Make a circle with the Ellipse Tool (L) and fill it with a Gradient (G).
We duplicate the circle and place it right next to the first one by holding the Alt+Shift key and dragging the circle to the right.
With CMD+D, we repeat that action about 20 times.
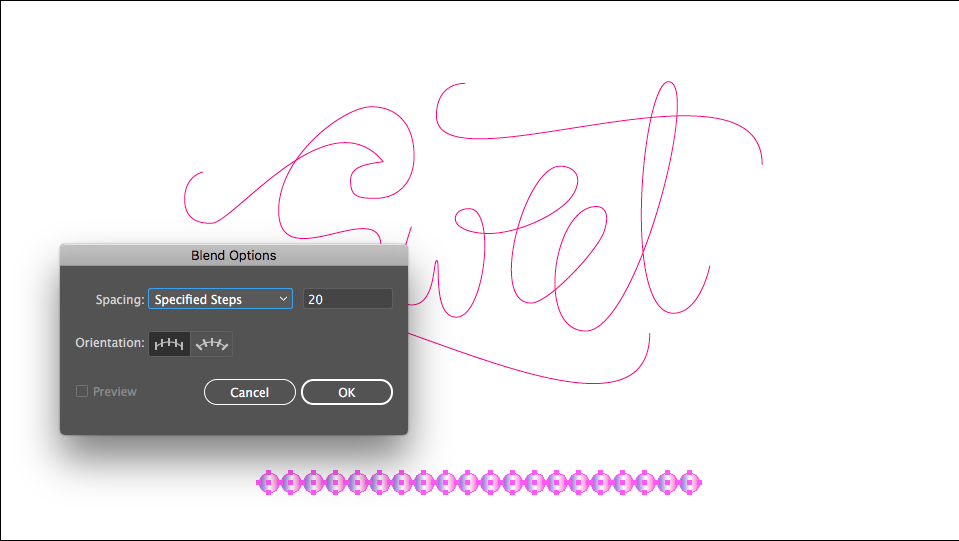
Select the row with the circles and double click the Blend Tool in the Tool Side Bar. The Blend Option Menu opens. Go to Specific Steps and enter 20.
Now go to Object > Blend > Make.
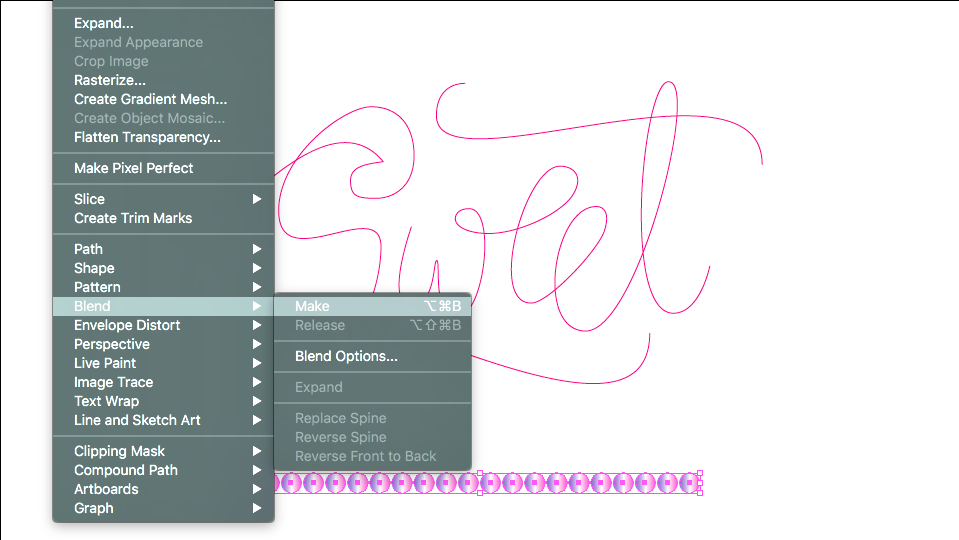
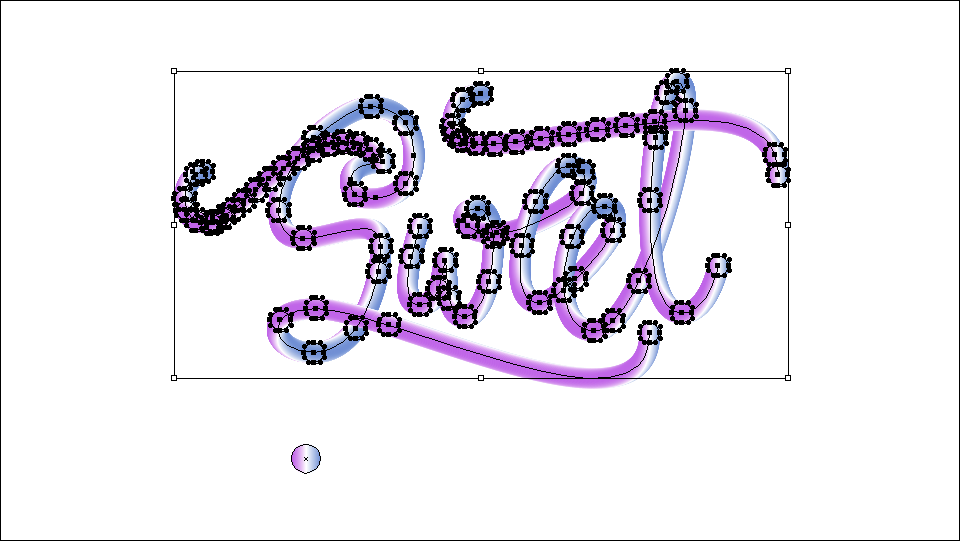
For the next step, we duplicate the row because we’ll need a backup.
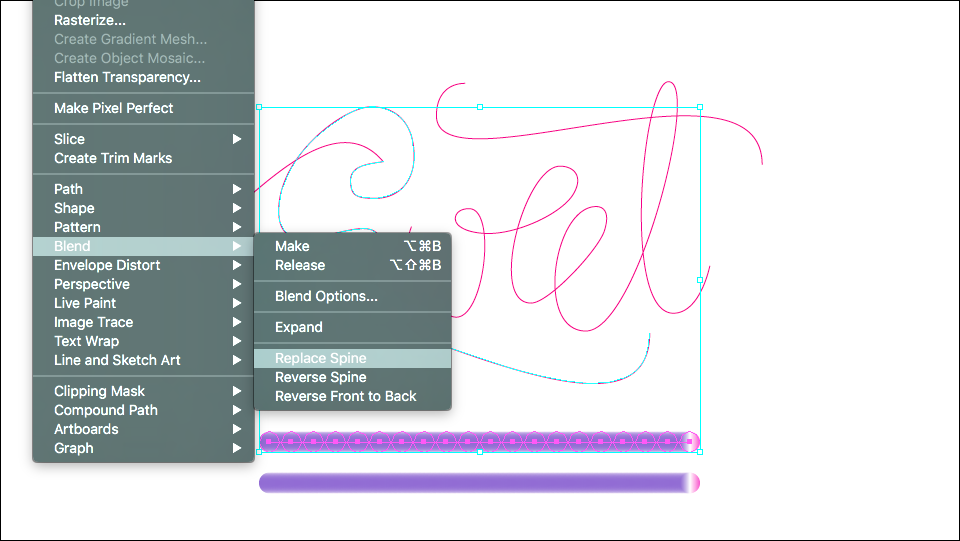
Hold the Shift key and select one of the two rows + the first path of your artwork. Then go to Object > Blend > Replace Spine.
This way, the vector line will get replaced with the gradient.
Repeat this process for every path of your artwork.
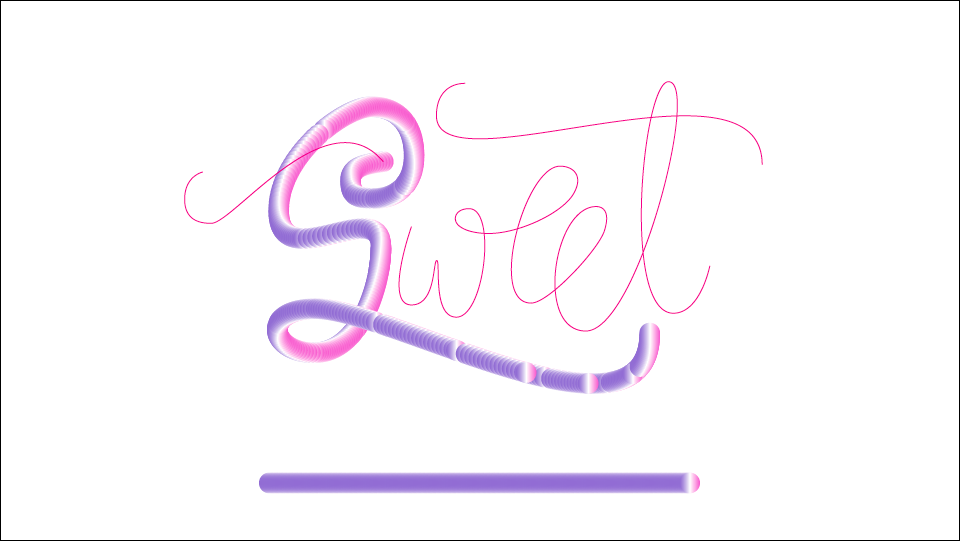
If the outcome looks rippled, no worries—we’ll fix that later! Keeping the steps in the blend setting low won’t slow down the computer.
As soon as we’ve replaced all the vector lines with the gradient, we want to smooth out the appearance of the artwork.
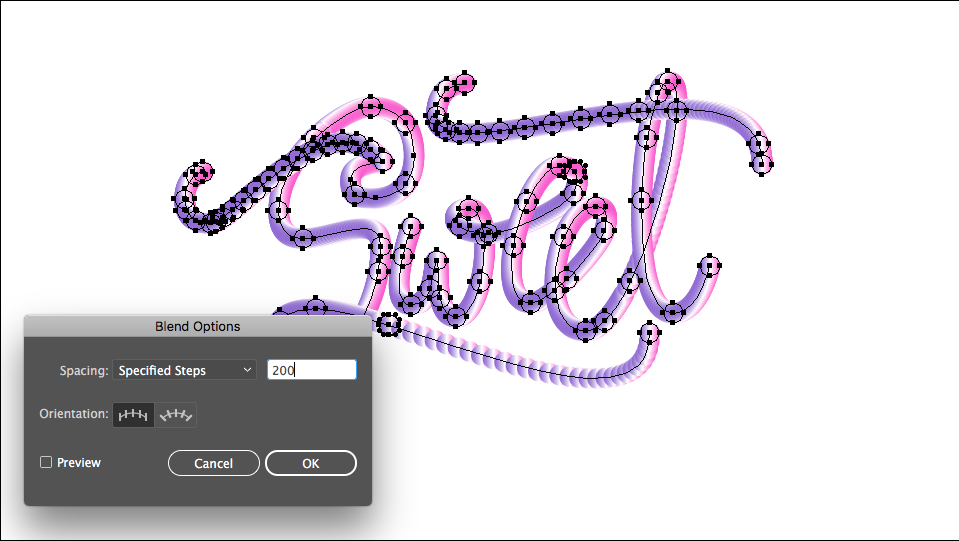
Select the entire artwork and go to the Blend Tool in the Tool Bar. Now we’ll increase the Specific Steps to about 200 or higher.
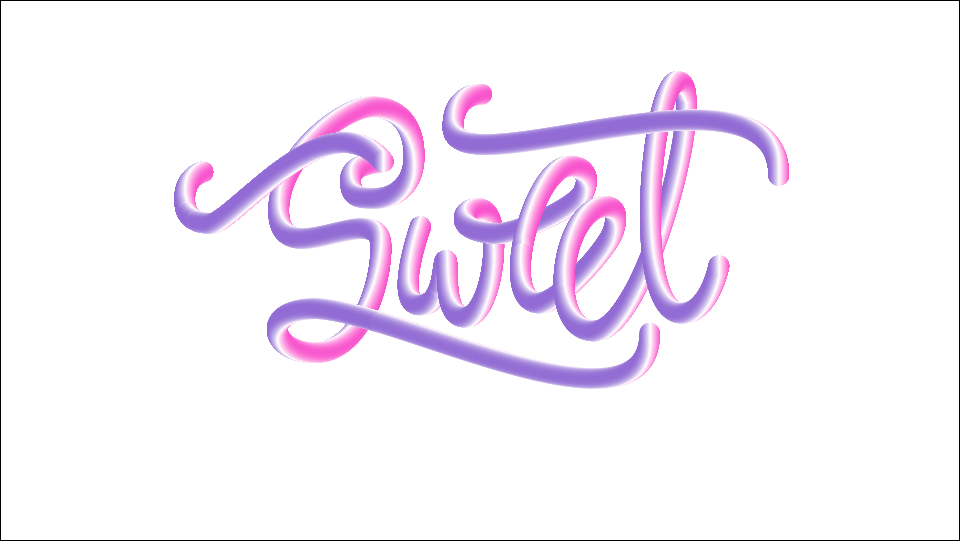
The 3D lettering already looks smoother now, but there are still some irregularities. We’re going to remove these by doing this simple and last step.
Select the circles with the Direct Selection Tool (A) from the Tool Bar and delete them.
We’ll then repeat this process until our 3D lettering is smooth like in the image below:
Changing the colors of the 3D lettering
If we’re not happy with the colors at this point, we can change them by repeating the step with the gradient circle.
Make a circle with the Ellipse Tool (L) and fill it with a new Gradient (G).
Then, select the the entire artwork with the Selection Tool (V) and click on the Eyedropper Tool (I). An Eyedropper icon will appear. This signals that we can pick the color from the circle with the new color.
This is an easy way to change the colors of the finished artwork.
Fixing Details in Photoshop

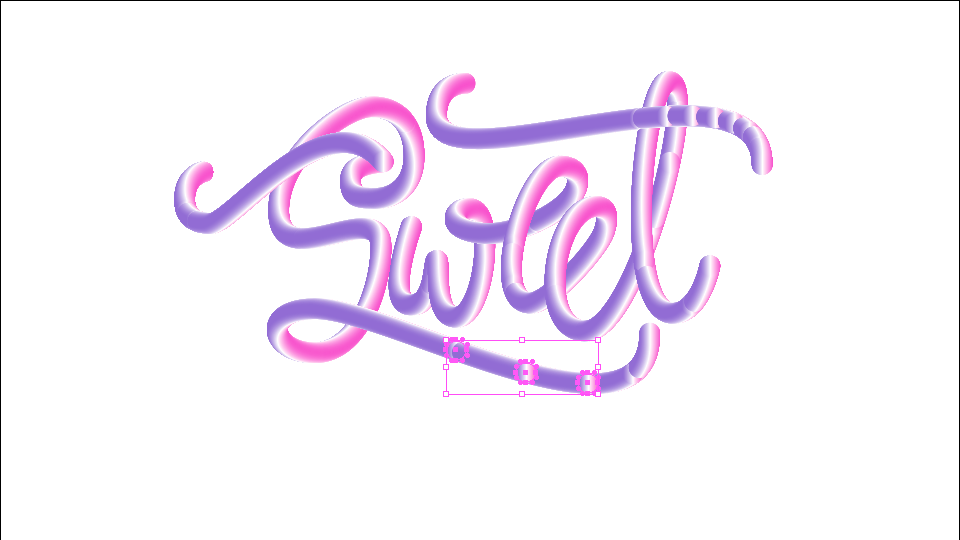
In the case of the Sweet artwork, I wanted the cross bar of the t to go through the letter stem.
To do that, I copy the cross bar separately from the rest of the artwork into Photoshop. That way the cross bar is on a separate layer.
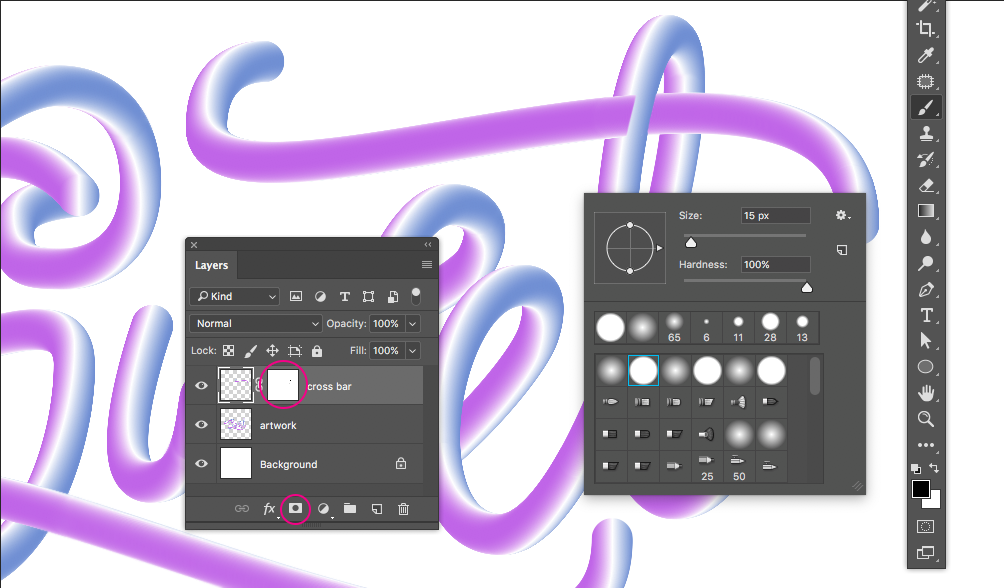
Select the top layer and go to Add Vector Mask on the bottom of the layer window.
Now select the mask window and use the Brush Tool (B) to “paint” over the artwork with black.
Note that the artwork of the cross bar disappears and the background comes through.
If you masked out too much of your layer, switch the color to white by pressing the X key and go over the artwork with the Brush Tool.
Pressing the key X makes it easy to switch between the two color swatches on the bottom of the Tool Bar.
The final 3D lettering made with the Blend Tool
The final artwork is a simple yet effective 3D lettering example for beginners made with the Blend Tool in Illustrator. Photoshop helps to tweak the 3D effect a bit more.
Have fun trying out this technique, and let me know if you have any questions!